Bourno's How-To Build a Skelerector Page
INTRODUCTION
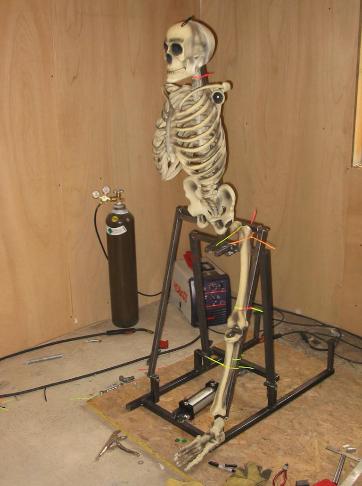
The following pages show detailed building pictures on my skelerector.
It was designed around the Menards foam skeleton dimension and uses a
2-1/2" bore x 5" stroke air cylinder to actuate it. See my other skelerector
page on details with the BooPack 4-bar software.
For square tubing, I like using 14ga tubing for more strength and welding.
The 1" square tubing could be substituted with 16ga, but I would recommend
the 14ga material for the 1-1/4" tubing.
All the bolt holes are 3/8". I will show where to place these holes, but you
will see that I do substitute 3/8" bushings at times afterwards. This is my
personal preference in thinking that these will last years and years to come
and not get some oval holes later on.
Let's start with some words I may
be using and which pieces those
are by showing them in the
picture shown to the left.
Head back up to the top of the
page and onto the next topic.
Base frame
Front Bar
Rear Bar
Assembly
Rotating Bar
Lifting Bar

